Showing posts with label cx5. Show all posts
Showing posts with label cx5. Show all posts
May 9, 2015
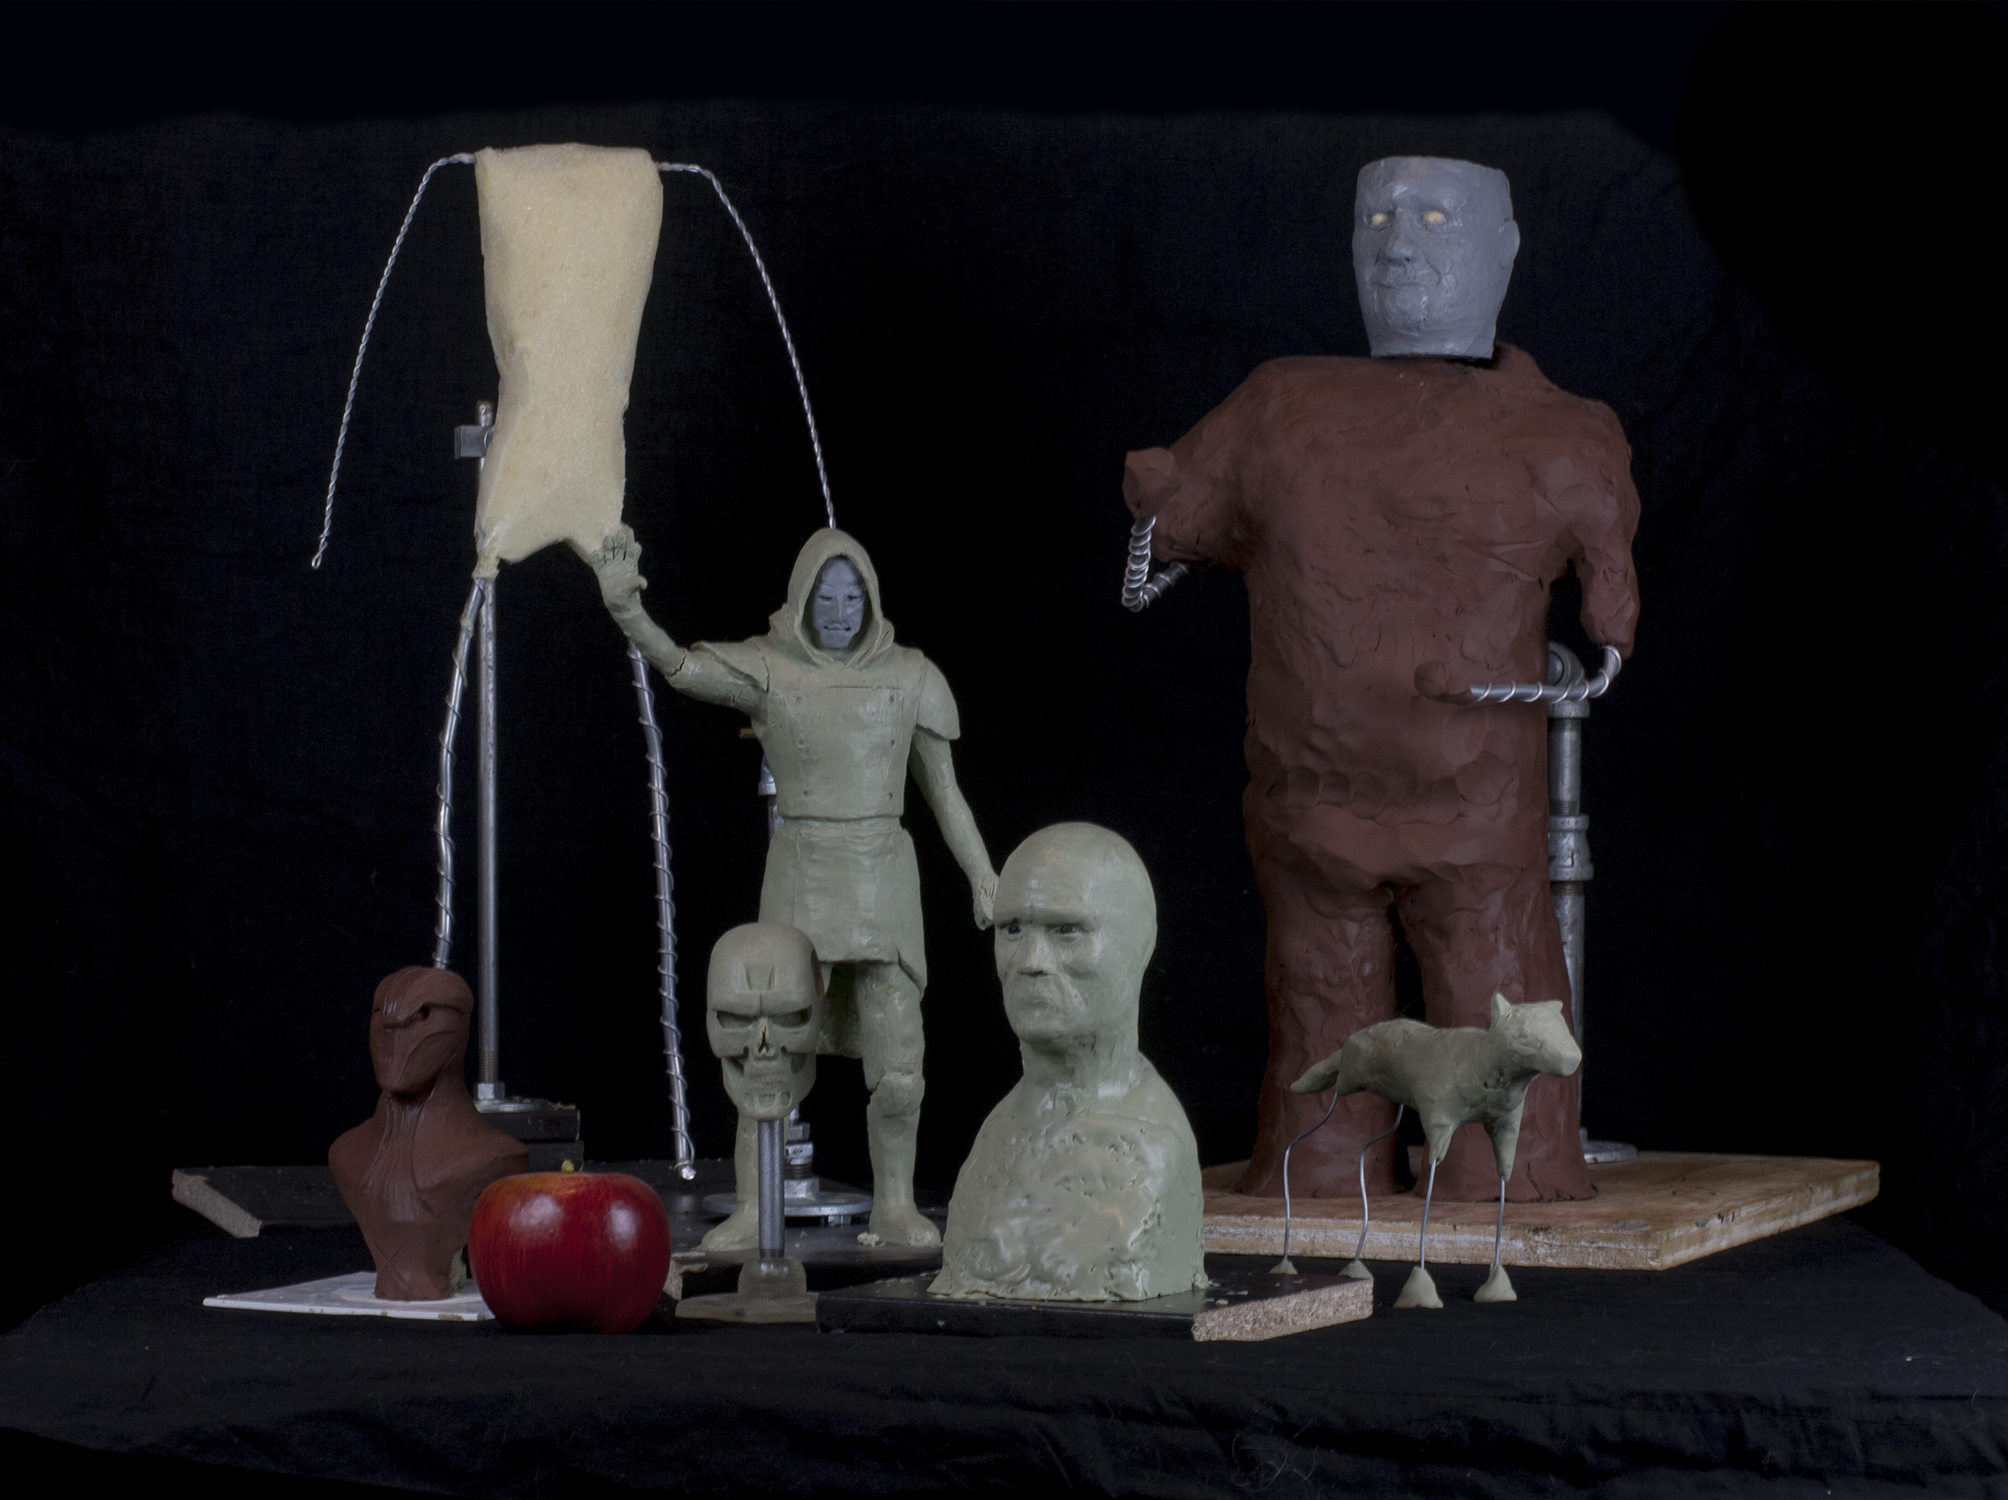
WIP Sculpts
Since last year I start many projects. Today since I was photoshooting refs, I took the time to photoshoot all my work-in-progress sculpts. Some are not feauturing there because I choose to switch to digital art instead: Captain Harlock ship replica: Arcadia.

Nov 8, 2014
Amon : WIP 002
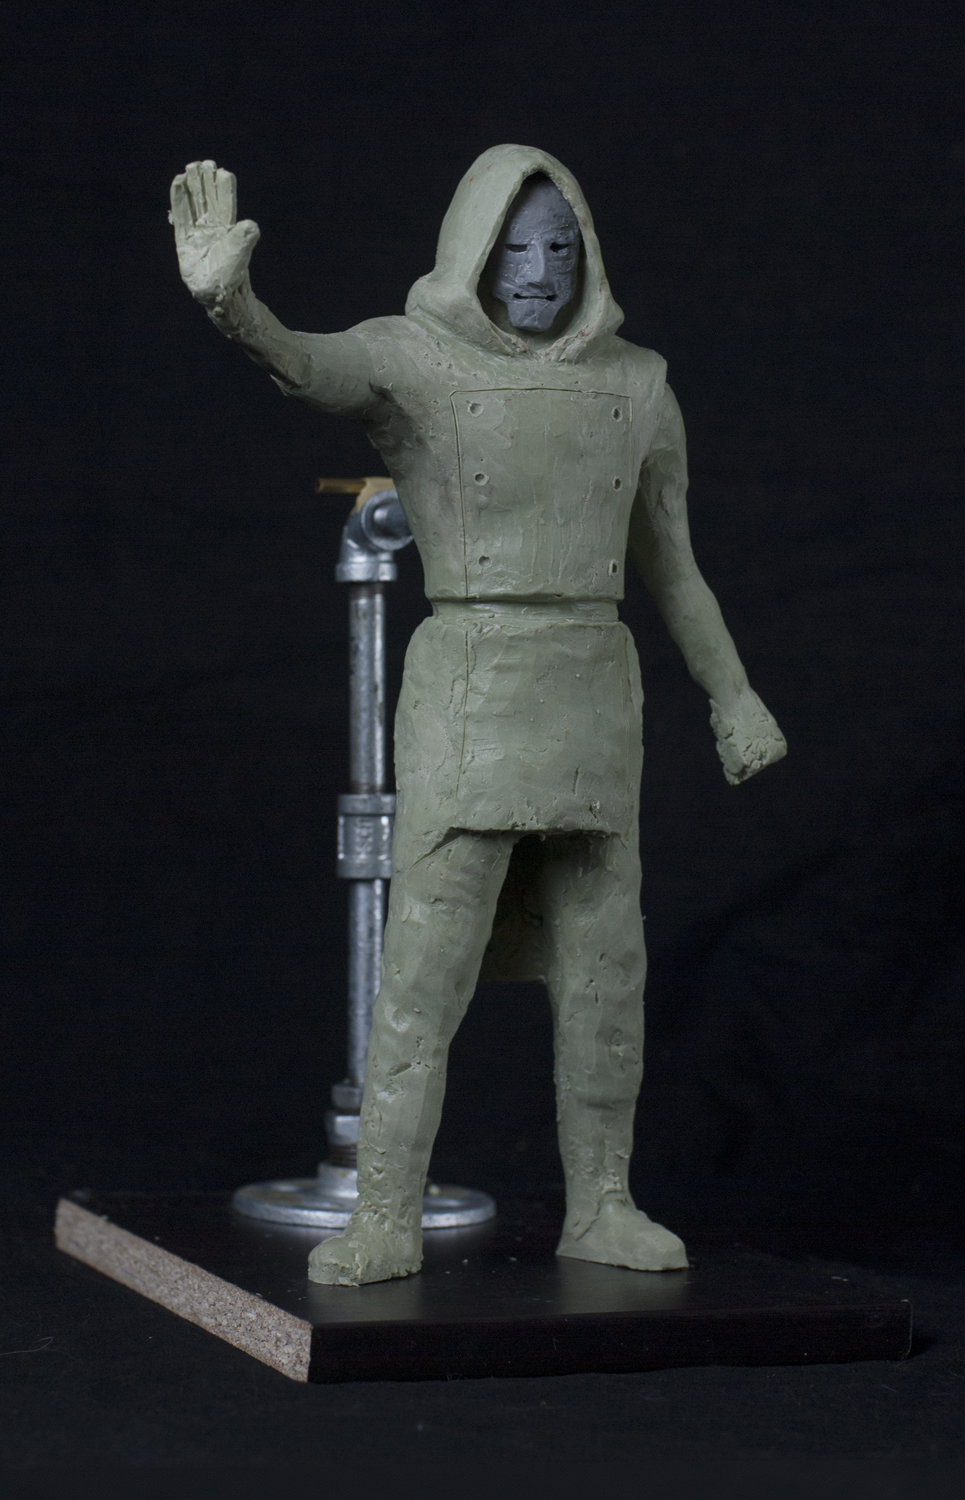
So here's my work-in-progress no.2. I close to block every shape and silhouette. Need to add the shoulders and knees pads, and also to change the hands so I have an armature of them.
Nov 1, 2014
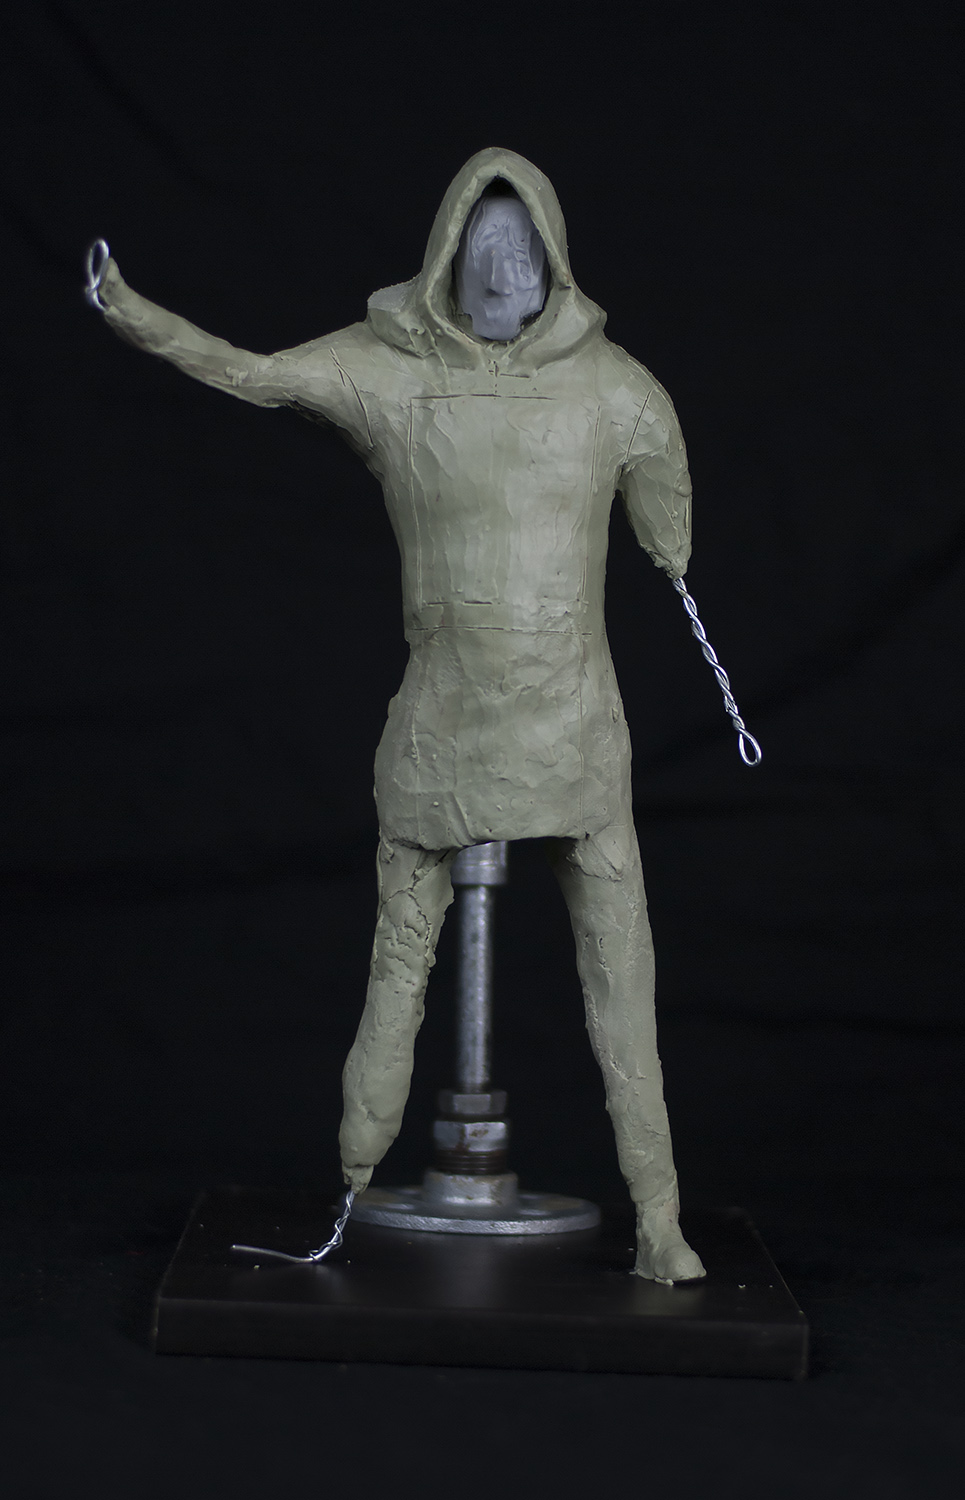
Amon : WIP 001
Also bought a Magnifier lamp to light my station and to help me with the future details.
Jun 29, 2014
PDJ: WIP 003
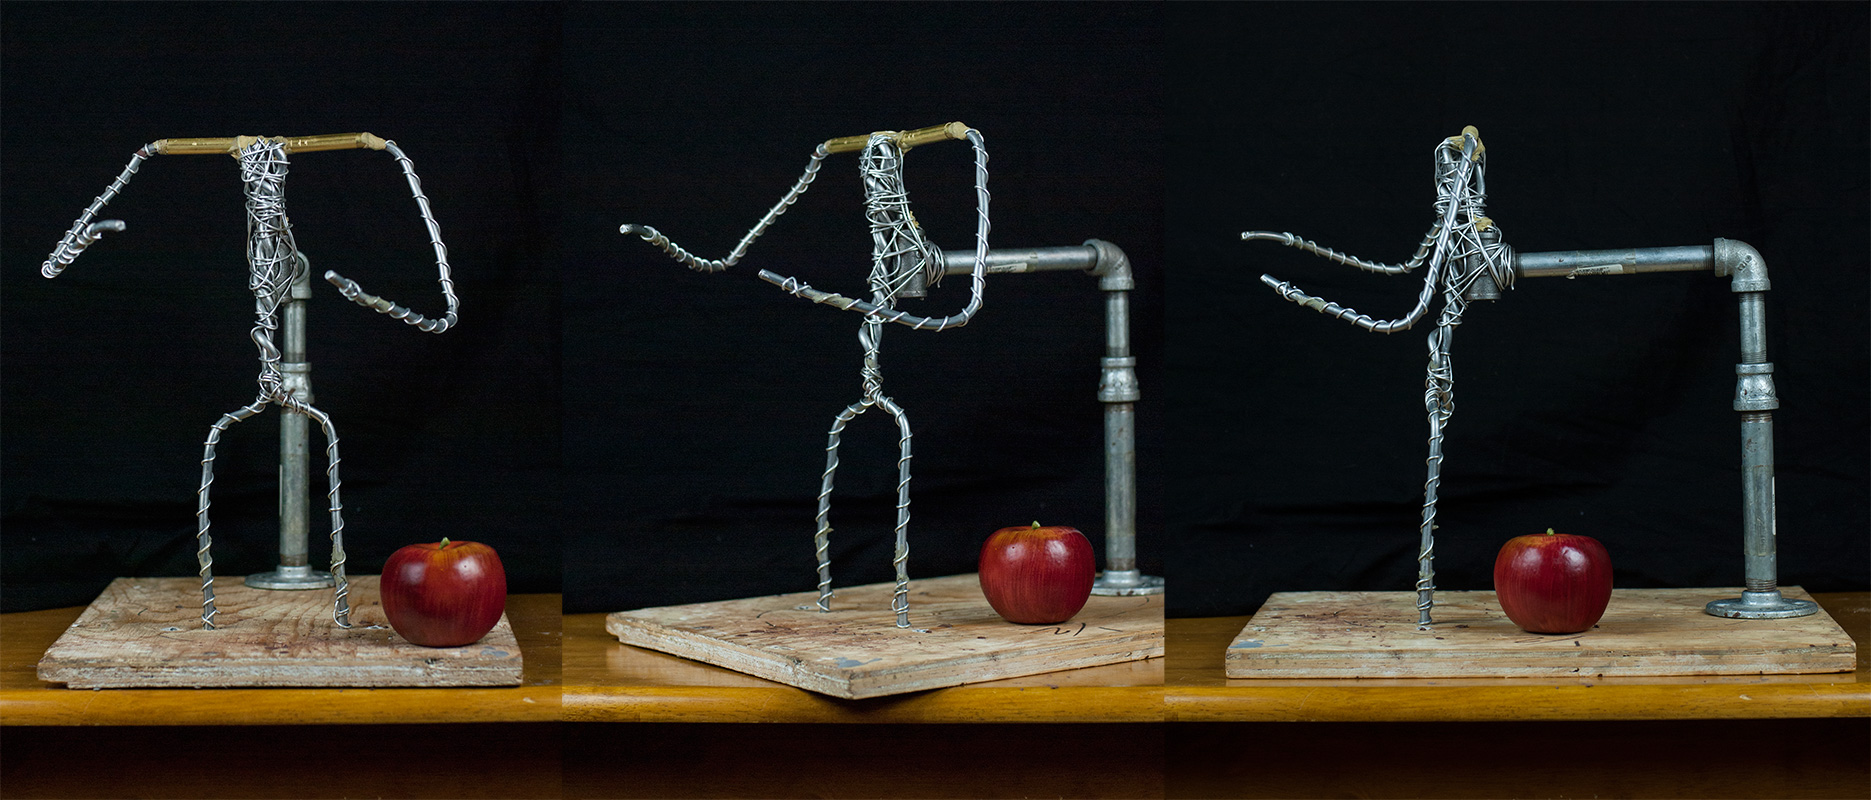 |
| WIP 002 - Armature updated (Added Joints and legs updated) |
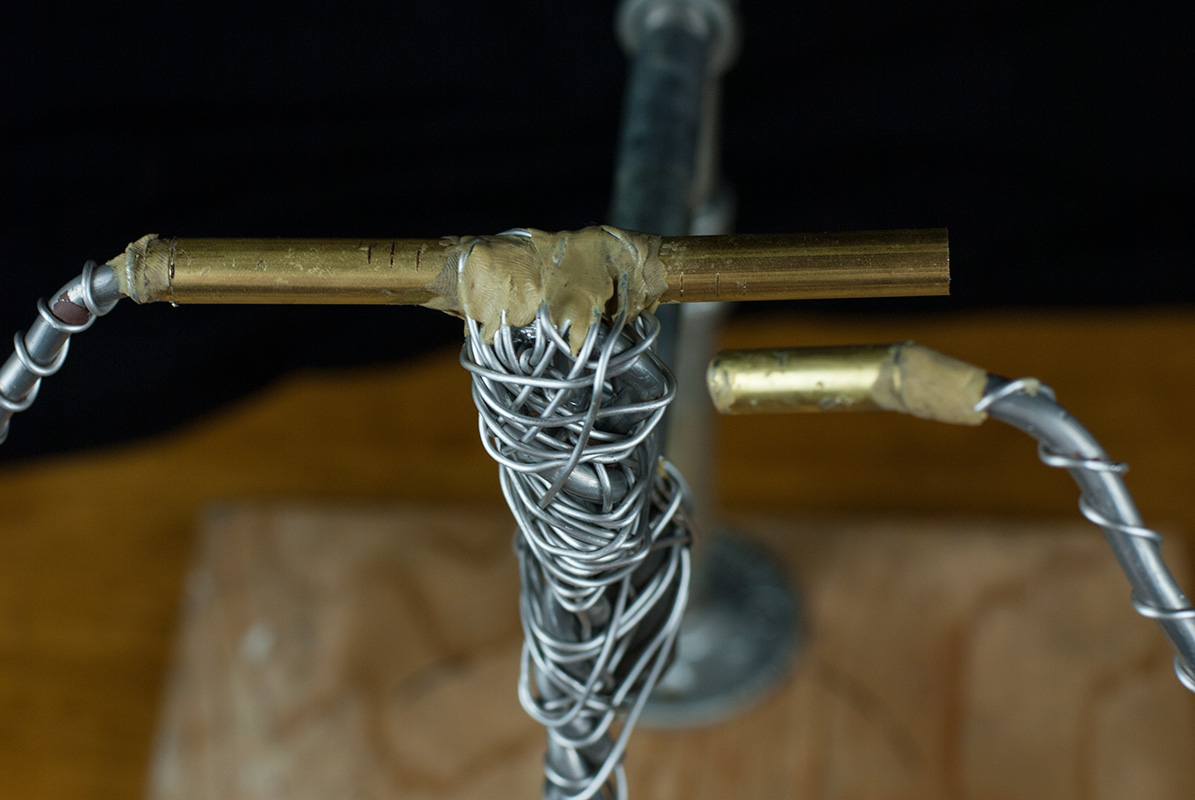
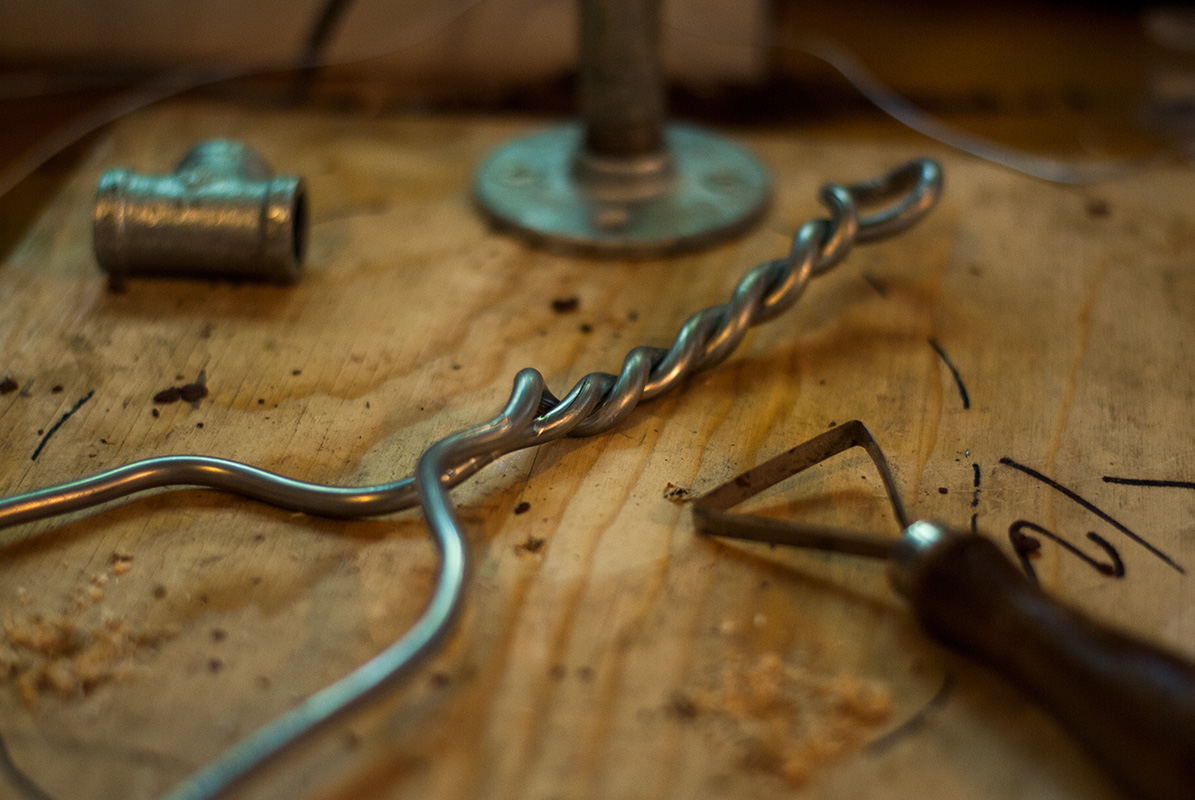
I bought my last Y2-klay cylinders. So a total of seven Y2-klay blocks for that sculpture. Better more then less right? Don't want to go back to the store for an half of a block. In Photoshop, I add the wip002 on top of my father REF and find out that my legs were to wide. So, I decide to rework the position of the legs and lower the all armature in the same time.
 |
| REF + Armature |
 |
| Armature joints |
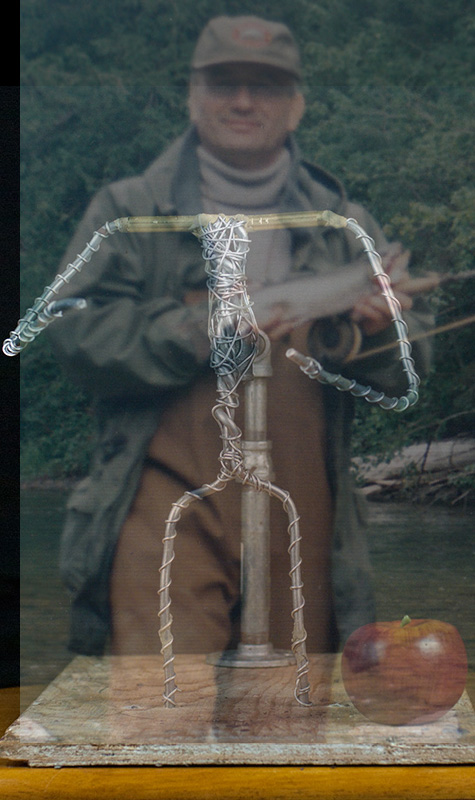
I also add joints for the arms, because you always have the plan the molding/casting stage. With my arms coming forward, I was aiming with a future problem of mold. So I decide to correct that now with the joints. I used brass tubing (didn't want to order square shape, so my joints trun a bit). Two size tubings so one enter into the other. I merge them with Epoxy Putty. I also solidify the armature in the center. Added an apple in the picture, as ref of scale (Sideshow Collectibles do that). So my scale is 1:3.
For the head, I start with the Cx5 material, not so easy to work with. Maybe I do it wrong, but the material turn cold very fast, no time to sculpt with normal sculpting tools. I really need the waxer for it, but the tip that come with the Ultra-Waxer is not good like Adam Beanes say in his Youtube Channel. You need two others tips (video at 13min 15sec) : Small Denture (Pink) and the Half Hollenback (Black). The best price I found was on the Kerrlab site. Because you won't get charge for the shipping. 79USD a tip is like 30-40 dollars shipping on some sites. No way I will order a $100 tip. The trouble with ordering from the Kerrlab website is: they redirect you to a local distributor and mine restrict to Dentists orders only. I have a friend that is father is a dentist, so I hope I can use my contact for that. Free shipping would be the best.
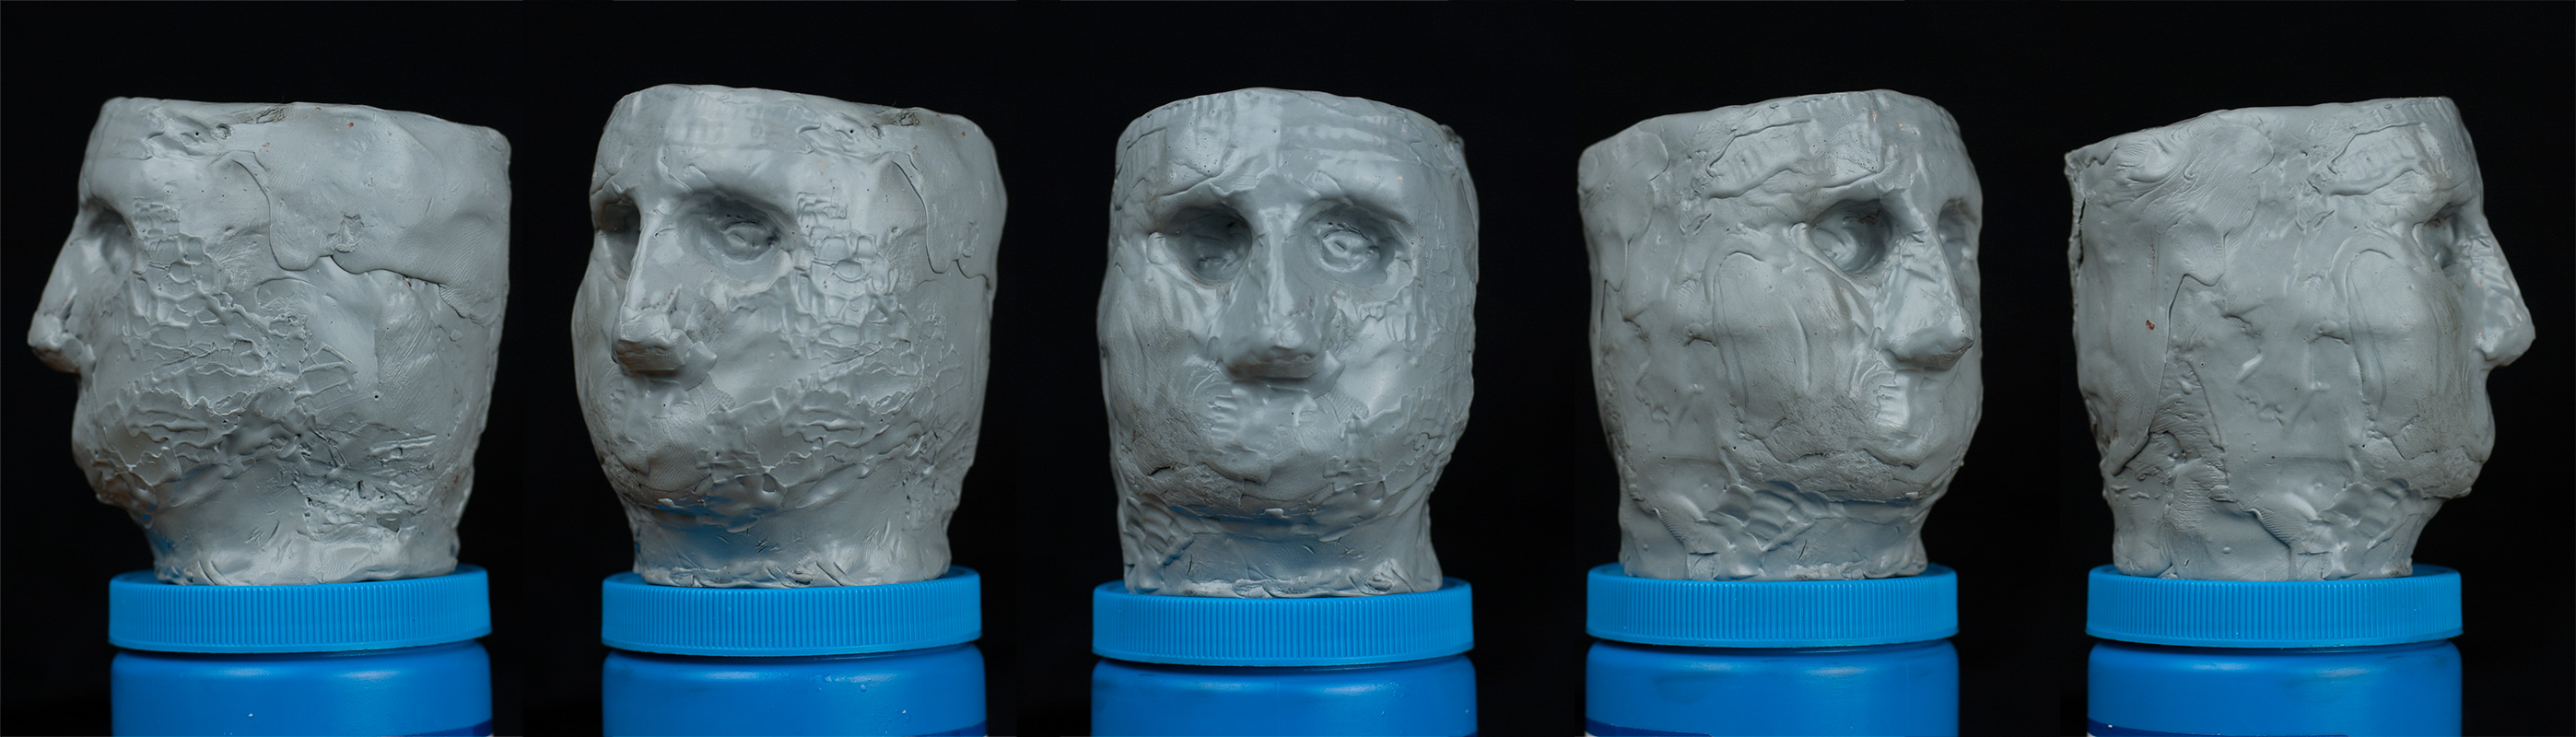
Adam do impressive sculpts with the Cx5 and a waxer, so I can do it to no? eheh. Here's the result for now. I dig the socket of the eyes to put two 12mm of wood balls has eyeballs. Should do the trick. This week, I finally plan to put the Y2-Klay on the armature and start posing it. I will let you know the result of my attempt of ordering from dentist my tips. Also soon, I will start buying for furniture for my art: jewelry workbench, magnetic lamp and a good stool, so I can remove my stuff for the dinner table. Few days off, so I should be able to do many of the thing I just said.
Jun 12, 2014
Sculpting: New Fry-pan / Project Epik as physically started
 |
| Electrical Fry-pan: 7 inch |
Just receive from Amazon my new Electrical Fry-pan. Hope my "modeling/clay" stage with be atchieve now with the Cx5.
In the mean time, I start the silicone mold of a 4x2 Lego brick for a future block design I got in mind for a long time now. So start next to it, a other silicone mold but of a joint bone silicone mold of a Megablok minifigure. I won't spoil the idea I got on the blog for now. I will let you see the final result one day. Let call it: Project Epik
May 27, 2014
Cx5: Heat problem
 |
| Dorkfood Sous vide DSV |
So I wrote to Adam Beane via his facebook page and he respond to me:
Hi Samuel, I have experienced this myself. Some frypans cycle hot & cold more than others. It can be very frustrating. Keeping the lid on it as much as possible can minimize the problem. Sometimes it is possible to find a "sweet spot" on the dial where the material will be just right. I recently found this device that regulates the frypan for you, to within +-1 degree. It may be interesting to you.
|
| Electrical Fry-pan: 7 inch |
If I have trouble with the material, I will use it just for small piece, like making glasses for 1:6 figure. And I will switch to Wax like Castilene Wax. Stay tune
For now, I only got a 3" ball of cx5 as a result of the 1lbc cx5 bar I bought.
May 24, 2014
New Tools
 |
| Adam Beane - Cx5 |
I also both a waxer for sculpting in solid stage. I bought a Kerrlab Ultra-waxer 1 (Version 2 is available since 2010, but my store just have an version 1). Main difference between the two version is the hability for the ultra-waxer 2 to have two pens with two differents heat temperature, instead of the version 1 who has just one pen. The Ultra-waxer 2 heat to 500f but the Ultra-waxer 1 heat to 700f.
 |
| Kerrlab - Ultra-waxer 1 |
 |
| Proctor Silex - Electrical 14" Fry-pan |
May 18, 2014
New Project: PJG: Traditional Sculpting
 |
| Project PJG: Step One - Armature build |
But Because I work all days in front a computer and I tempt myself with Sideshow Collectibles videos on Youtube, I decide to return to basic: Sculpting.. traditional way.
So Clay and Wax are my new tools. I'm not totally done with CG because It's so easy to undo with 3D. But It's hard to print with High quality results.
 |
| Jean-Guy Côté: my father |
The Canadian Fly fishing Museam of Waterloo even give him a gallery and a price for his contribution. So maybe because I miss him a bit, I would like to contribute to his passion (I'm not a fisherman) by a sculpt of him in a river Fly fishing. 1:3 scale.
I need to build the armature who will support the clay. I buy many new tools and materials for that project. I plan to sculpt his body in NSP medium clay by Chavant. For the head (I will sculpt it separatly because I think of the details and the mold in the future) I will sculpt it in Cx5 material from Adam Beane Industries who will arrive soon in my hand (just order). Finaly the hat will be done in Y2-Klay from Chavant, so can remove it. Y2 is an industrial clay and it's very hard when cold (they use it to prototype car, you can even sand them). You need to heat if you want to work with it. So a big lamp in a lined box of aluminium form the inside is needed. In an ideal situation I would sculpt everything in Y2-klay because I don't like the NSP if I have the Y2-klay. But I use to have just 2 cylinders of Y2-klay. And like 20 bricks of NSP. Maybe someday I will invest in 150 dollars of Y2-klay (a box of 8 cylinders). But I want to buy something else for now to finish my basic setup up: a Jewelry Workshop.
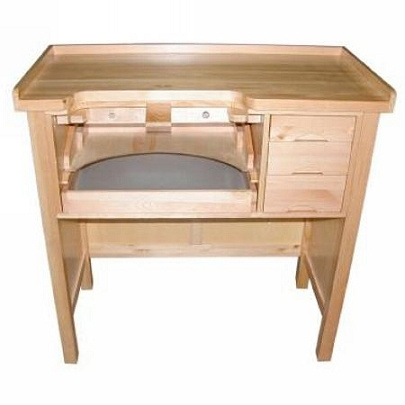 |
| Jewelry - Workbench |
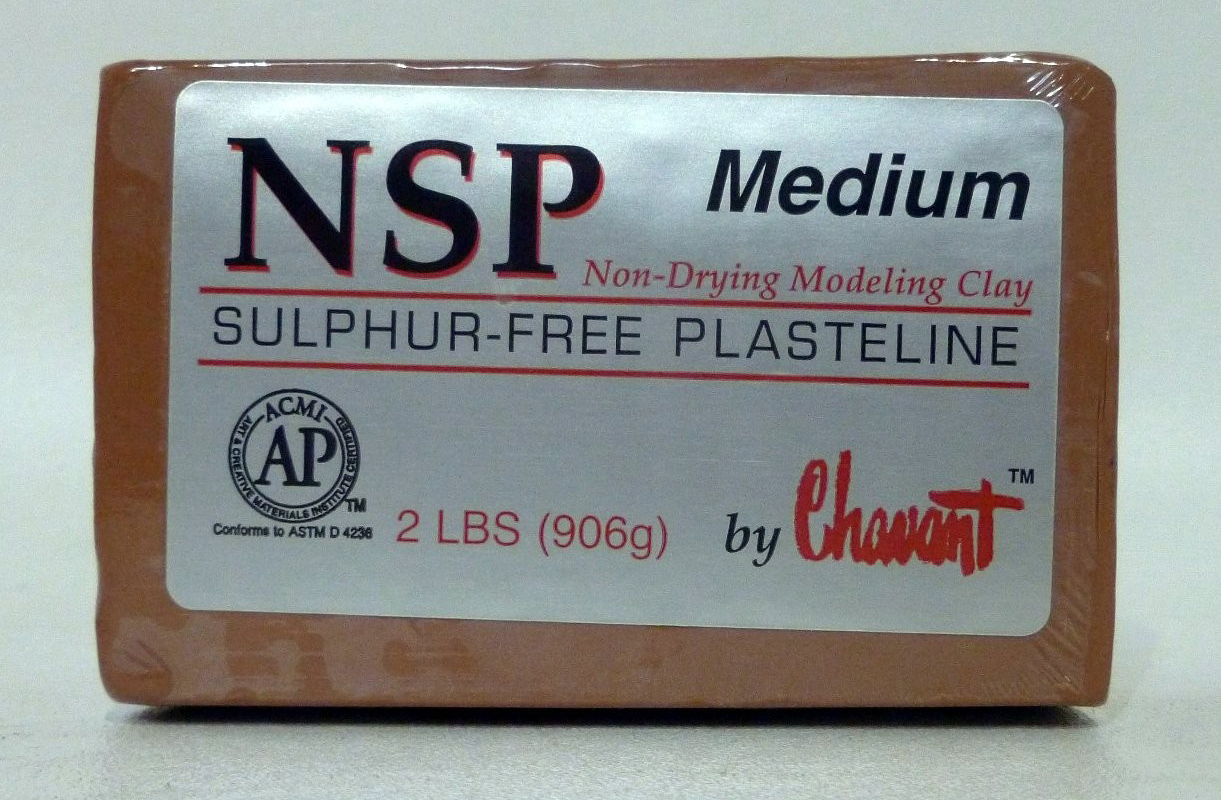 |
| NSP medium clay for the body part |
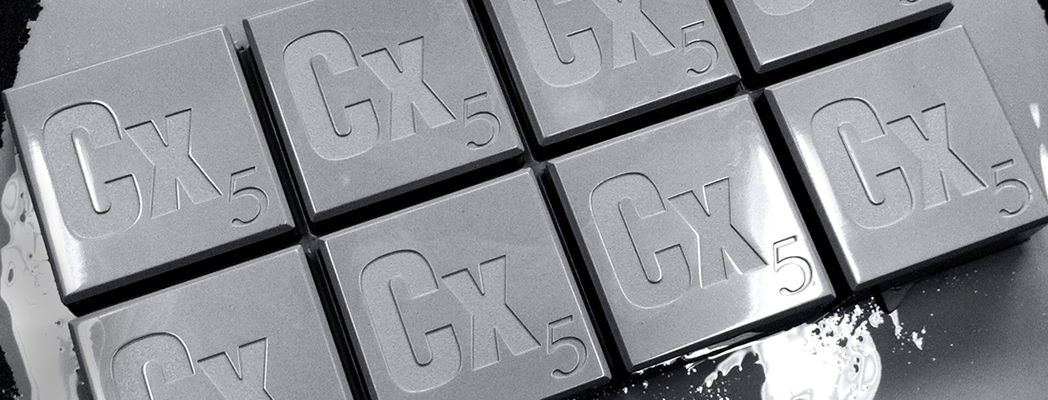 |
| Cx5 for the head |
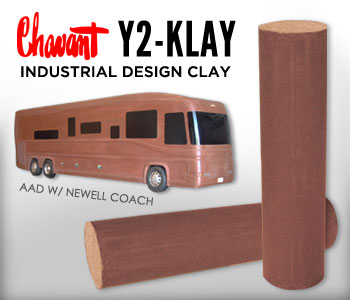 |
| Y2-klay for the hat |


Subscribe to:
Posts (Atom)